Ventilation and Airflow Basics for an Electric Sauna Heater, and What Getting It Wrong Costs

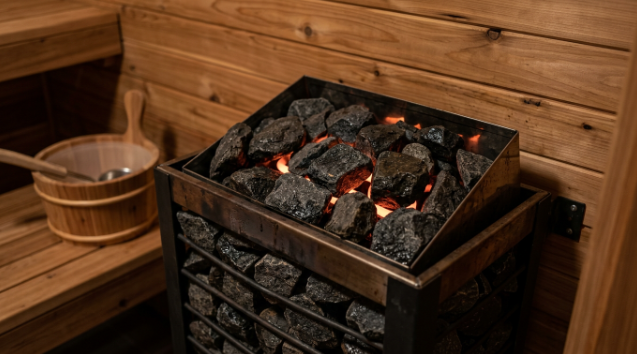
A properly ventilated electric sauna cabin needs an intake vent low on the wall near the heater and an exhaust vent higher on the opposite side, each typically 6 to 8 inches square, moving fresh air through the room instead of trapping stagnant, humid air around the heating elements. Skipping proper ventilation costs more than it saves: a heater working against dead air runs longer per session, ages its elements faster from trapped humidity, and delivers a stuffier session than the same heater in a properly vented room. Getting airflow right costs $50 to $500 depending on whether it is planned from the start or retrofitted later, a small line item against the cost of a heater replaced years early.
Why Does a Sauna Cabin Need Two Vents, Not One?
A single vent lets air in or out but not both at once, which leaves a room stuffy no matter how hot the heater runs. The standard setup places an intake vent low on the wall, close to but not directly beneath the heater, and an exhaust vent higher up on the opposite wall or in the ceiling. Cool air drawn in low gets pulled across the room, warmed by the heater, and pushed out high as it rises, creating a continuous, gentle circulation instead of a pocket of stale air near the bench. A cabin with only one vent, or none at all, tends to feel oppressive within 10 minutes even at a lower temperature than a well-vented room running hotter.
See also: How Jewelry Becomes Part of Your Everyday Lifestyle
Where Exactly Should the Heater Sit Relative to the Vents?
Placing the heater directly in front of or below the intake vent is a common mistake, since it lets cold incoming air get pulled straight into the heater and out through the exhaust before it ever circulates through the rest of the room. Most manufacturer install guides recommend positioning the intake vent near the heater but offset to the side, so incoming air still gets pulled across the heater’s hot surface and mixed through the cabin rather than short-circuited straight through. Getting this placement wrong does not damage the heater, but it does mean paying for more electricity to reach the same felt temperature.
What Does Adding or Fixing Ventilation Actually Cost?
Framing two vent openings with basic louvered grilles during initial construction typically runs $50 to $150 in materials for a DIY builder working from a kit, since the openings are simple rectangular cuts through a single wall thickness. Hiring it out, or retrofitting vents into an already-finished cabin where cutting through existing paneling and insulation is required, generally runs $200 to $500 depending on local labor rates and how much rework the retrofit involves. Planning vent placement before the walls go up is consistently the cheaper path, which is worth factoring in at the design stage rather than after the cabin is finished.
How Does Poor Airflow Affect the Heater Itself, Not Just Comfort?
Ventilation is not only a comfort issue. Trapped humidity around the heating elements, common in a poorly vented cabin, accelerates corrosion on the elements and internal wiring over time, which is a documented reason heaters in badly vented rooms sometimes fail years earlier than the same model in a well-vented cabin. A heater also has to run longer per session to reach target temperature against stagnant, humid air than it does in a room with proper circulation, which adds both wear and a modestly higher electric bill across hundreds of sessions over a heater’s working life. Keeping vent grilles clear of dust and lint, a five-minute check every few months, is a low-cost habit that protects both airflow and the heater underneath it.
What Should a Buyer Check Before Committing to a Cabin Design?
Before finalizing a cabin design or buying a prefabricated kit, it is worth confirming that vent placement is specified in the plans or the kit’s assembly instructions, not left as an afterthought. Kits and heater lineups sold through specialty retailers, including https://sweatdecks.com, generally document recommended vent sizing and placement alongside the heater specs, which is worth reviewing before cutting into any walls. A cabin built without checking this detail against the specific heater’s install manual risks a mismatch between vent size and the airflow that particular unit actually needs.
Does Better Airflow Change the Session Experience Itself?
Beyond mechanics, airflow affects how a session actually feels and, by extension, how consistently someone keeps using the sauna. A review in The American Journal of Medicine on the benefits and risks of sauna bathing noted that regular, sustained use over years is the pattern most associated with the reported cardiovascular findings, which means a cabin people actually enjoy sitting in matters as much as the heater’s raw output. A 2018 review in Mayo Clinic Proceedings summarizing sauna research reached a similar emphasis on consistency of use. A separate review in the American Journal of Physiology on heat and cold exposure found the body’s response depends on sustained, comfortable exposure at target temperature rather than a rushed, stuffy session cut short. A well-vented cabin is, in that sense, a practical way to support the habit the research actually studied.
What Tools Does a DIY Vent Installation Actually Require?
Cutting a vent opening into an existing cabin wall is a straightforward job for anyone comfortable with basic carpentry: a jigsaw or reciprocating saw for the opening, a stud finder to confirm the cut avoids framing members, and a simple louvered grille sized to the opening, typically fastened with a handful of wood screws. Sealing the edges of the cut with appropriate high-heat caulk, rated for sauna interior temperatures rather than general household caulk, prevents small gaps from becoming a heat-loss point around the vent frame itself. Most of this is a half-day project for one person working from a kit’s cutting template, which is one reason planning vent placement before building is cheaper than most owners expect.
For a new-build cabin, the vent openings are simply framed in alongside the door and any window during initial wall construction, which avoids cutting through finished paneling entirely. This is the single biggest reason ventilation is worth planning at the design stage: what costs $50 to $150 in materials during initial construction can run several times that once walls, insulation, and interior paneling all need to be reopened for a retrofit.
Frequently Asked Questions
Does an electric sauna cabin need a vent to the outside? Yes, a low intake vent near the heater and a higher exhaust vent on the opposite side, typically 6 to 8 inches square, keep air circulating and prevent stagnant, humid air.
How much does it cost to add proper sauna ventilation? Roughly $50 to $150 in materials for a DIY job planned into new construction, or $200 to $500 to retrofit vents into an already-built cabin.
What happens if the heater sits too close to the intake vent? Cold air gets pulled straight through to the exhaust without circulating, leaving the heater working harder for a less even temperature.
Can poor ventilation shorten a sauna heater’s lifespan? Yes, trapped humidity accelerates corrosion on heating elements and wiring, and stagnant air makes the heater run longer per session.
References
- Benefits and risks of sauna bathing, The American Journal of Medicine, 2001
- Does the Combination of Finnish Sauna Bathing and Other Lifestyle Factors Confer Additional Health Benefits? A Review of the Evidence, Mayo Clinic Proceedings, 2023
- Effects of heat and cold on health, with special reference to Finnish sauna bathing, American Journal of Physiology, 2018
By Ryan Coswell